Airline tubing and check valves for a sponge filter
A sponge filter needs a compatible air line, a properly oriented check valve, and an air pump matched to the tank. Here is what to buy and how to install it safely.
A sponge filter usually connects with standard aquarium airline tubing, but the tubing must fit the sponge filter’s air inlet and the air pump’s outlet securely. Add an aquarium check valve in the air line to help prevent water from siphoning backward into the pump during a power outage or when the pump is below the aquarium.
What to buy
For most sponge-filter setups, look for:
Aquarium-safe airline tubing with an inside diameter that fits the sponge filter stem and air pump outlet
A compatible check valve sized for the same airline tubing
A small air control valve, if you need to adjust bubble output
A secure air pump sized for the number and depth of sponge filters you plan to run
Many aquarium air lines use a nominal 3/16-inch inside diameter, but fittings are not completely universal. Check the sponge filter and pump instructions, and test the fit before cutting the tubing. The line should push on firmly without splitting or slipping off.
Choosing airline tubing
Silicone versus clear vinyl tubing
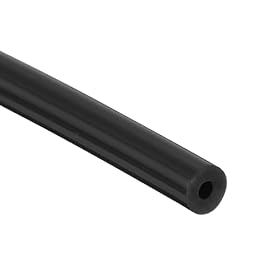
Silicone airline tubing is soft and flexible. It works well when the pump and aquarium are close together or when the tubing must make tight bends. Its flexibility can also make it easier to install without pulling a lightweight sponge filter out of position.
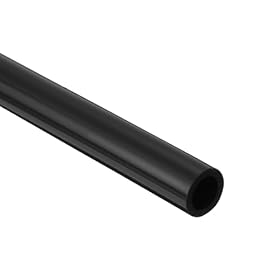
Clear vinyl or PVC airline tubing is generally firmer. It can be useful for longer straight runs and may hold its shape better, but sharp bends can restrict airflow or kink the line.
Choose tubing based on the installation rather than appearance. Tubing should be long enough to reach the pump with a little slack, but avoid unnecessary loops and excessive length. Long, narrow, or kinked lines increase resistance and can reduce the air reaching the sponge filter.
Check the connection size
Do not force oversized tubing onto a small air fitting. A loose connection can leak air, while forcing a tight tube over a fitting can crack a plastic stem. If the fit is slightly loose, use a proper compatible connector or replace the tubing with the correct size rather than relying on an unreliable seal.
Product prices and availability are accurate as of the date/time indicated and are subject to change. Any price and availability information displayed on Amazon.com at the time of purchase will apply to the purchase of this product.
Why a check valve matters
A check valve allows air to travel toward the aquarium while restricting water from flowing back toward the pump. This is especially important when the air pump sits below the aquarium’s water level.
Without a check valve, a stopped pump can allow water to move backward through the airline. Depending on the setup, that water can reach the pump, wet the surrounding area, and damage the pump or create an electrical hazard.
A check valve is not a substitute for safe placement. If practical, position the air pump above the aquarium’s water level and follow the pump manufacturer’s instructions. Use a drip loop on the pump’s power cord so water running down the cord cannot reach the outlet.
Product prices and availability are accurate as of the date/time indicated and are subject to change. Any price and availability information displayed on Amazon.com at the time of purchase will apply to the purchase of this product.
How to install the tubing and check valve
Place the sponge filter on a stable, level area of the aquarium floor.
Measure the airline from the sponge filter to the pump, leaving enough slack for gentle bends.
Cut the tubing cleanly with scissors or a tubing cutter.
Connect one end to the sponge filter’s air inlet or uplift-tube fitting.
Install the check valve in the line between the aquarium and the air pump.
Follow the arrow on the check valve. The arrow should point toward the aquarium and away from the air pump.
Connect the other side of the check valve to the pump outlet.
Secure the line so it does not pull on the sponge filter or rest against sharp edges.
Start the pump and inspect the setup. Air should move into the sponge filter, and there should be no water traveling toward the pump.
If you are also using an air control valve, place it on the pump side of the check valve or use the arrangement recommended by the valve manufacturer. A control valve should adjust airflow; it should not be used to block a pump outlet completely unless the pump is specifically designed for that setup.
Matching the air pump to the sponge filter
Tubing does not compensate for an undersized air pump. A pump must provide enough airflow at the depth of the sponge filter and support the number of outlets in use.
Consider:
Water depth: Deeper aquariums require the pump to push against greater pressure.
Number of sponge filters: Two filters or multiple air-driven devices require more total airflow than one small sponge filter.
Adjustability: A pump with adjustable output or separate outlets can make it easier to balance several filters.
Noise tolerance: Pump vibration can be reduced with a soft pad and a stable surface, but some pumps remain audible.
Back pressure: Fine-pore air stones and restrictive fittings may require more pump capacity than open airline outlets.
Use the sponge filter and air pump manufacturer’s recommended range when available. Too little air produces weak circulation and may not move water effectively through the sponge. Excessive airflow can create harsh bubbles, disturb fish, or make a small sponge filter move around the tank.
Troubleshooting a sponge filter airline
No bubbles from the sponge filter
Check the likely causes in this order:
Confirm the pump is switched on and its outlet is connected.
Check that the check-valve arrow points toward the aquarium.
Look for kinks, crushed sections, or loose tubing connections.
Remove and inspect the check valve. A blocked or faulty valve can stop airflow.
Check whether the sponge filter’s air stem or uplift tube is obstructed.
Try a short, direct piece of tubing to isolate a tubing problem.
If the pump hums but cannot move air through a known-clear line, unplug it and follow the manufacturer’s cleaning instructions. Do not open or repair an electrical pump unless the manufacturer permits it and you are qualified to do so.
Weak bubbles or reduced flow
Weak airflow can result from a kinked line, a loose connection, a clogged check valve, excessive tubing length, or a pump that is too small for the water depth. A dirty sponge can also restrict the water side of the filter, although rinsing should be done in removed aquarium water rather than untreated tap water to help preserve beneficial bacteria.
If the airflow is still weak with a short, unobstructed line, the pump may be worn or underpowered. Replacing the check valve or airline is reasonable when those parts are brittle, cloudy, split, or obstructed. Consider a larger or replacement pump when the current pump cannot maintain the required airflow at the aquarium’s depth.
Water reaches the airline or pump
Turn off and unplug the pump before handling the line. Move the pump above the aquarium’s water level if the manufacturer allows it, install a correctly oriented check valve, and add a drip loop to the power cord. If water has entered the pump, do not reconnect it until the manufacturer’s instructions address the situation; replacement may be safer than continued use.
The tubing keeps coming off
The tubing may be the wrong size, hardened with age, stretched at the end, or under tension. Cut away the damaged end and test the fit. Replace the line if it no longer grips the fitting securely. Do not use a loose connection near electrical equipment.
When to replace parts
Replace airline tubing when it becomes brittle, permanently kinked, split, discolored from buildup, or too loose to stay attached. Replace a check valve if it leaks backward, becomes blocked, shows cracking, or stops passing air after cleaning according to its instructions.
Replace the air pump when it produces abnormal electrical or mechanical behavior, repeatedly overheats, has a damaged cord, or cannot deliver adequate airflow after the tubing and check valve have been ruled out. Unplug questionable electrical equipment and consult the manufacturer or a qualified professional rather than continuing to operate it near water.
FAQ
What size airline tubing does a sponge filter use?
Many aquarium sponge filters use nominal 3/16-inch airline tubing, but fittings vary. Confirm the required size for the specific sponge filter and air pump before buying.
Which way should the check valve point?
The arrow on the check valve should point toward the aquarium and away from the air pump. This allows air to flow to the sponge filter while helping block reverse water flow.
Does a sponge filter need a check valve?
A check valve is strongly recommended, especially when the air pump is below the aquarium’s water level. It helps reduce the risk of water siphoning into the pump if the pump stops.
Can I use any flexible tubing for a sponge filter?
Use tubing sold for aquarium air systems or otherwise confirmed to be aquarium-safe. It should fit the filter stem and pump outlet securely and resist kinking.
Why is my sponge filter making weak bubbles?
Common causes include a kinked or loose airline, an obstructed check valve, a blocked air stem, excessive tubing resistance, a dirty sponge, or an undersized or failing air pump.