A canister filter is primed by filling the filter housing and hoses with aquarium water, then removing enough trapped air for the pump to circulate water. Unplug the filter before checking hoses or opening the canister, and follow the manufacturer’s instructions because priming systems differ between models.
Setup · Mon Sep 07
How to prime a canister filter
Priming a canister filter means filling the housing and hoses with aquarium water so the pump can begin circulating. Follow the correct hose setup, fill the canister, open the valves, and use the primer until water flows steadily.
Before you prime the filter
Prepare the filter before pressing the primer:
- Put the canister below the aquarium’s water level unless the manufacturer specifically allows another setup.
- Confirm that the intake and return hoses are connected to the correct ports.
- Make sure the intake strainer is fully underwater.
- Open any hose valves or quick-disconnect valves.
- Check that the canister lid is seated evenly and its gasket is clean.
- Fill the aquarium to its normal operating level.
- Keep the filter unplugged until water has entered the canister and the system is ready to run.
Never run a canister filter dry. The motor and impeller depend on water for cooling and lubrication.
Replacement aquarium filter tubing
 LANDEN Aquarium Filtration Hose Tubing for Canister Filter System 12/16mmLANDEN
$17.99 as of
View on Amazon JARDLI Pro Aquarium Tubing for Canister Filters, 10 ft, 5/8 in (16/22 mm)JARDLI
$28.99 as of
View on Amazon FZONE Aquarium Tubing 5/8" ID 3M Clear PVC Hose for FiltersFZONE
$19.99 as of
View on Amazon
Product prices and availability are accurate as of the date/time indicated and are subject to change. Any price and availability information displayed on Amazon.com at the time of purchase will apply to the purchase of this product.
How to prime a canister filter
1. Fill the filter canister
If the design allows it, remove the lid and fill the canister with aquarium water. Place the baskets, media, and internal parts in their correct positions first. Do not pack media so tightly that water cannot pass through it.
Some filters are designed to prime through a built-in pump instead of being filled manually. In that case, close the lid securely and use the filter’s specified priming method rather than forcing water into an opening that is not intended for filling.
2. Connect and open the hoses
Attach the intake and return hoses firmly. The intake hose should run from the aquarium to the filter’s intake connection. The return hose should run from the filter’s outlet connection back to the aquarium.
Open the valves gradually if the filter has valves. Water should begin moving into the canister, and air may escape through the return line. Keep checking the connections for drips.
3. Use the primer
Press or operate the primer repeatedly according to the filter’s instructions. The primer usually draws aquarium water down the intake hose and into the canister.
Continue until:
- The canister is full or nearly full.
- Water reaches the return hose.
- Air stops moving through the hoses, or only small bubbles remain.
- Water is returning to the aquarium.
Do not keep forcing the primer if it becomes unusually difficult to move. A closed valve, blocked hose, poor lid seal, or incorrect hose connection may be preventing water flow.
4. Plug in the filter
Once the canister is full and water is moving through the system, plug the filter into a properly installed outlet. Use a drip loop in the power cord so water cannot run along the cord into the outlet.
The filter may make a brief rattling or gurgling sound while remaining air leaves the impeller chamber. If the noise continues, unplug the filter and investigate rather than allowing it to run dry or with severe air restriction.
5. Remove remaining air
With the filter running, gently tilt or rock the canister a small amount if the manufacturer permits it. This can help release air trapped around the impeller or inside the media baskets. Do not lift the canister by its hoses or tip it far enough to spill water.
Check the return flow and look for leaks around the lid, valves, hose connections, and bulkhead fittings. Stop the filter immediately if water is escaping near the electrical plug or outlet.
Replacement canister filter seals
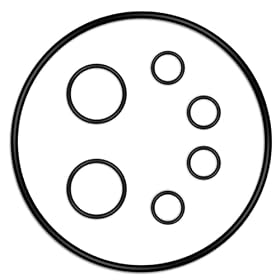 ETZ O-Ring Seal Kit for Fx5/Fx6 Aquarium Cartridge Filter, Fit for Fluval A-20207, A-20210, A-20212…ETZ
$14.99 as of
View on Amazon Captain O-Ring – Replacement A20063 A20064 Orings for Fluval 304, 305, 306, 307, 404, 405,…Captain O-Ring
$9.99 as of
View on Amazon O-Ring Seal Kit Compatible with Fluval FX5 FX6 Aquarium FiltersTCVG
$14.29 as of
View on Amazon
Product prices and availability are accurate as of the date/time indicated and are subject to change. Any price and availability information displayed on Amazon.com at the time of purchase will apply to the purchase of this product.
If the canister filter will not prime
Check these causes in order.
Check the filter media and baskets
Overpacked or incorrectly positioned media can restrict water flow. Confirm that each basket is seated correctly and that the coarse intake or mechanical media is not completely clogged. Rinse reusable mechanical media in removed aquarium water, not untreated tap water, when preserving beneficial bacteria matters.
Replace disposable or damaged media according to the filter’s instructions. Media that has collapsed, swollen, or become packed with debris may need replacement.
Check for a blocked hose or intake
Inspect the intake strainer, intake hose, return hose, and connectors. Snails, plant debris, algae, and compacted sludge can stop the siphon.
Disconnect power before removing a hose. Use an aquarium hose-cleaning brush or an appropriate cleaning tool, and do not use sharp objects that could puncture the tubing. Make sure the hose is not sharply bent or crushed behind the aquarium.
Check seals and connections
A small air leak on the intake side can prevent priming even when no water visibly leaks out. Inspect:
- The canister lid gasket
- The gasket’s groove and contact surfaces
- Quick-disconnect O-rings
- Hose ends and clamps
- Cracked connectors or valves
- The intake strainer connection
Clean the gasket and its seating surfaces. Replace an O-ring or gasket that is flattened, cracked, stretched, or no longer sealing. Use only the lubricant specified by the manufacturer; household petroleum products can damage some aquarium seals.
Confirm the setup
Make sure the canister sits below the aquarium, the intake remains submerged, and all valves are open. Verify that the intake and return lines are not reversed. A hose that is too long, kinked, or routed upward in a way that traps air can also make priming difficult.
If the aquarium water level has dropped below the intake strainer, refill the aquarium before trying again. Turn off other equipment only as needed and follow the instructions for your tank and livestock.
Check for a full canister or excessive air
A canister that was opened for cleaning may contain a large air pocket. Recheck the lid, fill the housing as directed, and operate the primer slowly. Repeatedly pumping without allowing water to enter will not solve a blocked or leaking intake line.
A small amount of air in the return stream after maintenance can be normal, but continuous bubbles often indicate an intake-side air leak or a hose connection that is not sealed.
Check the impeller and motor last
If water is reaching the canister but the filter still will not circulate, unplug it before inspecting the impeller. Look for debris, a damaged impeller, a worn impeller shaft, or a missing rubber bushing. Follow the manufacturer’s disassembly instructions and never put fingers into a running impeller chamber.
If the motor hums, overheats, trips a breaker, smells burned, or remains silent after correct priming, stop using it. Electrical troubleshooting and internal motor repairs should be handled according to the manufacturer’s instructions or by a qualified professional.
Aquarium hose cleaning brush
 Aquarium Filter Brush Set, Flexible Double Ended Bristles Hose Pipe Cleaner with Stainless Steel Long…SLSON
$9.99 as of
View on Amazon Patelai 12 Pieces Aquarium Filter Brush Set Aquarium Cleaning Brush ToolsPatelai
$11.99 as of
View on Amazon Patelai 3 Pcs Aquarium Filter Hose Brush Stainless Flexible 61 ''79 ''Patelai
$9.99 as of
View on Amazon
Product prices and availability are accurate as of the date/time indicated and are subject to change. Any price and availability information displayed on Amazon.com at the time of purchase will apply to the purchase of this product.
When to replace a part or the filter
A replacement gasket, O-ring, hose, valve, or impeller is usually the reasonable next step when that part is visibly damaged or no longer seals after cleaning. Replace aquarium tubing if it has become hard, cracked, permanently kinked, or too loose on its fittings.
Replacing the entire canister filter may make more sense when the housing is cracked, the lid or valve assembly is no longer supported, the motor has failed, or replacement parts cost nearly as much as a suitable new filter. Match any replacement filter to the tank’s size, flow needs, available cabinet space, and acceptable noise level rather than relying on flow rate alone.
FAQ
How long does it take to prime a canister filter?
A properly connected filter may prime in a few minutes. It can take longer after cleaning or when air is trapped in the hoses. If repeated priming does not bring water into the canister, check the valves, hose routing, intake blockage, and lid seal instead of continuing to pump.
Should I fill a canister filter with water before starting it?
Only if the filter’s design and instructions allow manual filling. Some models are meant to be filled through a built-in priming system. The goal is to prevent the motor from running dry, but the correct filling method depends on the filter.
Why is my canister filter blowing bubbles after priming?
A few bubbles can occur while trapped air leaves the system. Continuous bubbles usually point to air entering on the intake side, a loose hose connection, a damaged O-ring, a poorly seated lid gasket, a low aquarium water level, or a kinked hose.
Can I prime a canister filter while it is plugged in?
Do not open the canister, remove hoses, or inspect the impeller while it is powered. Prime it using the manufacturer’s procedure, then plug it in only after water has filled the system and the connections are secure.